As promised, here is the tutorial for our Global Twister game! There are a variety of ways you can play it. The cards allow for selecting a continent and then right/left, hand/foot options. For younger one's it is possible to make the game even simpler. My previous post outlined some of those options!
Materials:
* blue vinyl fabric, measuring 55in (width of fabric I bought) x 36in.* download and print my map and the cards. (Make sure you set the page scaling to none for the map so that it prints at full size.) You will need 25 pages for the 5x5paged map.* acrylic paints for each continents. (Make sure these are not be translucent. I didn't read the fine print and discovered this the hard way...) I chose this particular color scheme because it matches all of the Montessori geography materials. Although I don't own any, I find their wooden puzzle mapsbeautiful!
* paintbrush* paint sealer. I used a spray on Scotchgard fabric protector.
Directions:
- Print the maps and assemble them into one large map. Each page is numbered in the top left-hand corner to make it easier to assemble. Either tape together or better yet trace onto large sheets of butcher paper if you have some.
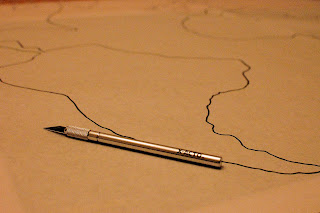
- Next we will create our giant stencil by cutting out the continents with an exacto knife.
- Gently punch out continents and then place completed stencil map on your blue vinyl tablecloth. Using books and small weights make sure that stencil is securely placed so it won't move while you work.
- Paint using strokes that go from the stencil towards the middle to minimize any paint that would seep under the edge. It might take more than one coat in order to cover the blue underneath.
- Allow to dry and spray with sealant. Once this dries, carefully remove the paper stencil and you are ready to play!
Feel free to link to this tutorial, but please don't repost. I have a newfound respect for those that do tutorials on a regular basis. That was a lot more work than I anticipated...
Want to receive updates via email or in an RSS feed?
I love being able to connect with you all via facebook as well.
Come check out all of our WORLD GEOGRAPHY ADVENTURES!
Some of the ways we've used our Global Twister Map:
Going Global - how we play Global Twister
Want to receive updates via email or in an RSS feed?
I love being able to connect with you all via facebook as well.


génial!
ReplyDeletethis is such a great idea!!!! im happy I stumbled upon your blog :)
ReplyDeleteI'm going to feature this sometime in the next couple of weeks :)
ReplyDeleteThank you for taking the time to do this!
ReplyDeleteC.R.A.F.T,
ReplyDeleteThat would be awesome!
This is so awesome I HAVE to make one. I love seeing things to use for geography. Thank you also for taking the time to comment on my blog. I love seeing what other people are doing for their homeschool.
ReplyDeleteTammy
I made this to use for a preschool camp this summer. I used an old blackout curtain that broke off the roll since I had it already. Instead of making the stencils, I printed your outlines and traced them onto the vinyl, pressing really hard with my pen. It left a little indentation which I traced with a fine sharpie marker. Then I free-hand painted everything and filled in the oceans with blue. It turned out so great, and only took me two hours (not including the spraying time.) There isn't quite the level of detail as yours, but it will serve us well for teaching the continents to three and four year olds. Thank you for this great tutorial!
ReplyDeleteRachel, I just LOVE how you modified this! Thanks for sharing!!!! That sounds like a quicker way to do it and met the objective of teaching continents to your group!
ReplyDeleteI'm working on this now and I can't wait to finish it. It will be a perfect activity to add to our fall units!! Instead of blue vinyl, I am using a 5x4 cotton canvas drop cloth ($5 at Lowes!) I cut out the continents like a poster above, and traced them onto the cloth with pencil. I'm going to mix fabric medium with my acrylic paints and I'm hoping that will prevent the need to seal it. Thanks so much for this tutorial, Heather!
ReplyDelete